The Sharp Atomic Clock is a radio-controlled timekeeping device that ensures precise accuracy by syncing with atomic signals. It features advanced wireless technology for temperature monitoring and easy setup.
1.1 Overview of the Sharp Atomic Clock
The Sharp Atomic Clock is a high-precision timekeeping device that automatically synchronizes with atomic signals for exceptional accuracy. It features a sleek, user-friendly design with a clear display showing time, date, and temperature. The clock utilizes wireless thermo technology to monitor both indoor and outdoor temperatures. Designed for convenience, it includes automatic daylight saving adjustments and manual mode options. The device operates on batteries and is easy to set up, ensuring reliable performance. Its advanced radio-controlled system ensures it remains accurate within one second. The comprehensive user manual guides users through setup, operation, and maintenance for optimal functionality.
1.2 Benefits of Using an Atomic Clock
The Sharp Atomic Clock offers unparalleled precision, syncing daily with atomic signals to ensure accuracy within one second. It eliminates manual time adjustments, providing reliable performance. The clock features automatic daylight saving updates and wave/manual modes for flexibility. Its wireless thermo technology allows monitoring indoor and outdoor temperatures, adding convenience. With a clear display and easy-to-use interface, it enhances user experience. Battery-operated and low-maintenance, it ensures long-term functionality. The comprehensive manual guides setup and troubleshooting, making it a practical choice for home or office use. Its advanced features and durability make it a superior timekeeping solution.
Features and Controls of the Sharp Atomic Clock
The Sharp Atomic Clock features a clear display, wireless thermo technology, and automatic updates. Controls include SET, WAVE, and RESET buttons for easy operation and customization.
2.1 Display and Interface
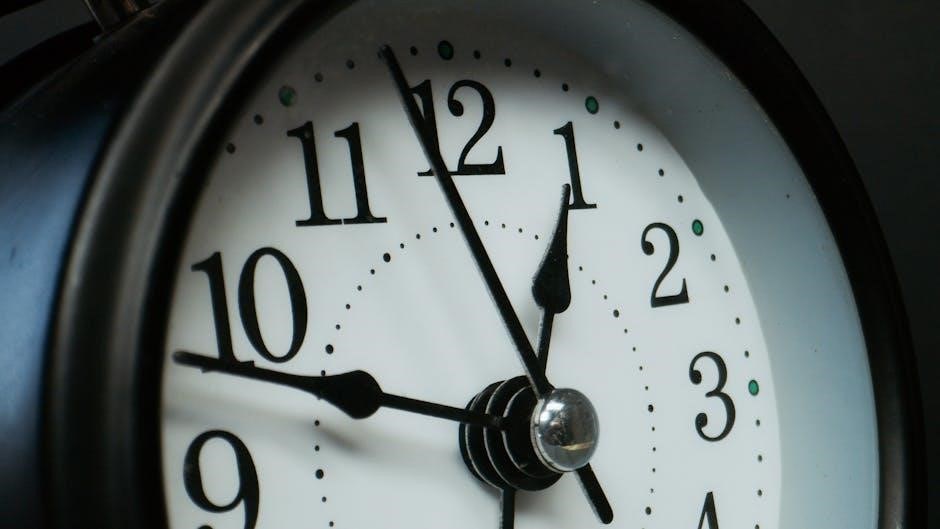
The Sharp Atomic Clock boasts a clear, easy-to-read display showing time, date, day of the week, and indoor/outdoor temperatures. Its intuitive interface simplifies navigation, ensuring users can quickly access features like time zones and alarm settings. The display’s brightness is optimized for readability, while the layout ensures essential information is visible at a glance. Buttons are logically arranged, making it easy to adjust settings or switch modes. This design focuses on user convenience, providing a seamless experience for both setup and daily use.
2.2 Time, Date, and Temperature Functions
The Sharp Atomic Clock automatically syncs with the WWVB signal for precise time and date accuracy. It displays the day of the week and updates for daylight saving time. The clock also features wireless thermo technology, showing both indoor and outdoor temperatures simultaneously. This functionality ensures users stay informed about time, weather, and environmental conditions. The split-screen display allows for easy viewing of all data, making it a versatile and practical addition to any home or office. Its advanced sensors and atomic accuracy provide reliable performance year-round.
2.3 Wireless Thermo Clock Technology
The Sharp Atomic Clock features Wireless Thermo Clock Technology, enabling it to display both indoor and outdoor temperatures simultaneously. The remote sensor transmits data wirelessly, allowing placement anywhere in the home. This technology ensures accurate temperature readings and seamless integration with the clock’s atomic timekeeping. The clear display shows time, date, and temperature side by side, making it easy to monitor your environment at a glance. This feature enhances the clock’s functionality, providing users with comprehensive information about their surroundings alongside precise time accuracy.

Installation and Setup
The Sharp Atomic Clock requires careful unpacking and placement to ensure proper signal reception. Follow the manual for initial setup and syncing with the atomic signal.
3.1 Unpacking and Placement
Carefully unpack the Sharp Atomic Clock and ensure all components are included. Place the clock on a stable surface, avoiding direct sunlight and extreme temperatures. For optimal signal reception, position it near a window, ideally facing the direction of the nearest atomic signal transmitter. Keep it away from metal objects and electronic devices to minimize interference; Ensure proper ventilation to prevent overheating. Avoid placing the clock in humid or dusty environments. Follow the manual’s guidelines for ideal placement to ensure accurate timekeeping and reliable performance.
3.2 Initial Setup and Syncing with Atomic Signal
Insert the batteries as indicated in the manual, ensuring correct polarity. Place the clock near a window for optimal signal reception. Press and hold the SET button to enter manual mode if automatic syncing is delayed. The clock will search for the WWVB signal, which may take a few minutes. Once synced, the display will show the correct time, date, and temperature. Allow up to 24 hours for the first successful synchronization. Refer to the manual for troubleshooting if the signal is not received. Ensure the clock is placed away from interference sources for reliable operation.
Operation and Functionality
The Sharp Atomic Clock operates seamlessly, automatically updating time via WWVB signals. It offers manual mode, wave mode, and effortless time zone adjustments for optimal functionality.
4.1 Time Zone and Daylight Saving Adjustments
The Sharp Atomic Clock automatically adjusts for daylight saving time and time zones when receiving the WWVB signal. If the signal is weak, manual adjustments can be made using the ‘SET’ button to cycle through time zones (PST, MST, CST, EST). For daylight saving, enable or disable the DST feature by pressing and holding the ‘SET’ button until the DST indicator appears. Ensure the clock is in manual mode before making these adjustments. Refer to the manual for specific button functions and detailed steps to ensure accurate timekeeping. Proper adjustments guarantee seamless time management year-round.
4.2 Manual Mode and Wave Mode Settings
The Sharp Atomic Clock offers Manual Mode for settings without an atomic signal and Wave Mode for optimal signal reception. To enter Manual Mode, press and hold the ‘SET’ button until the display flashes. Use the arrow keys to adjust time, date, or other settings. Wave Mode enhances signal stability by adjusting the antenna’s sensitivity. Activate it by pressing the ‘WAVE’ button; the clock will automatically tune for the strongest signal. These modes ensure accurate timekeeping even in areas with weak atomic signals, providing flexibility and reliability for users. Always refer to the manual for detailed activation steps.
Maintenance and Care
Regularly clean the clock with a soft, damp cloth to maintain its display clarity. Avoid harsh chemicals or abrasive materials. Replace batteries as needed, ensuring correct polarity.
5.1 Cleaning the Clock
To maintain your Sharp Atomic Clock’s performance and appearance, clean it regularly with a soft, damp cloth. Avoid using harsh chemicals, solvents, or abrasive materials, as they may damage the display or housing. Gently wipe the clock’s surface, paying attention to the display area. Avoid touching the screen directly, as fingerprints can cause smudges. For the outdoor sensor, ensure it is free from dust or debris for accurate temperature readings. Clean the clock periodically to prevent dust buildup and ensure optimal functionality. Always handle the clock with care to avoid accidental damage during cleaning.
5.2 Battery Replacement and Care
Replace the batteries when the clock stops or shows low power. Use alkaline batteries for optimal performance. Open the battery compartment located at the back of the clock. Remove the old batteries and insert the new ones, ensuring correct polarity. Avoid mixing old and new batteries. Replace all batteries at the same time to maintain accurate timekeeping. Store spare batteries in a cool, dry place. Dispose of used batteries properly, following local regulations. Clean the battery contacts with a soft cloth if corrosion occurs. Proper battery care ensures reliable operation and extends the clock’s lifespan. Always refer to the manual for specific battery type recommendations.
Troubleshooting Common Issues
Troubleshoot common issues like signal loss or inaccurate time by checking antenna placement and location. Reset the clock if it doesn’t sync. Refer to the manual for troubleshooting.
6.1 Signal Loss or Inaccurate Time
If the Sharp Atomic Clock loses its signal or displays inaccurate time, ensure it is placed away from electromagnetic interference and obstructions; Check the antenna orientation and location. Avoid placing the clock near metal objects or electronic devices, as they may disrupt the signal. Move the clock to a central location with a clear path for the radio waves. If issues persist, reset the clock by removing the batteries for 30 seconds. After resetting, allow the clock to sync with the atomic signal again. Refer to the manual for detailed troubleshooting steps.
6.2 Battery Life and Performance
The Sharp Atomic Clock operates on replaceable batteries, ensuring continuous functionality. For optimal performance, use high-quality alkaline batteries. Avoid mixing old and new batteries or using rechargeable types, as this may reduce reliability. If the clock’s timekeeping becomes erratic, check the battery level and replace them if necessary. Store spare batteries in a cool, dry place to maintain their capacity. Clean the battery compartment regularly to prevent corrosion; Refer to the manual for specific battery replacement instructions to ensure uninterrupted operation and accuracy of your Sharp Atomic Clock.
